⠀
SETUP GUIDE
We can't wait for you to experience your brand new Cloud Ceiling LED Kit.
Here is your complete guide to easily set up your cloud ceiling.
A video tutorial is available at the end of this page for visual assistance.
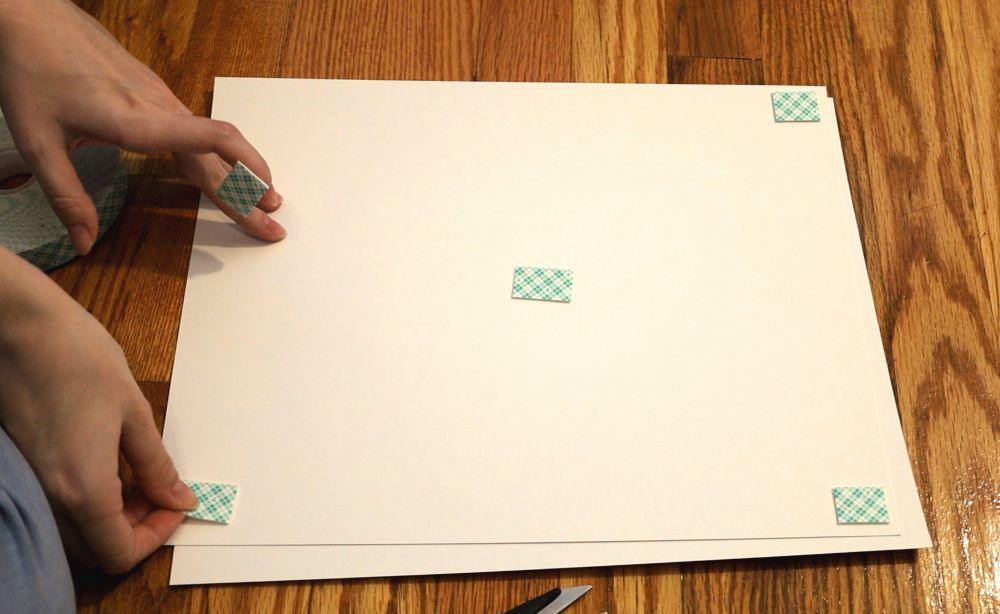
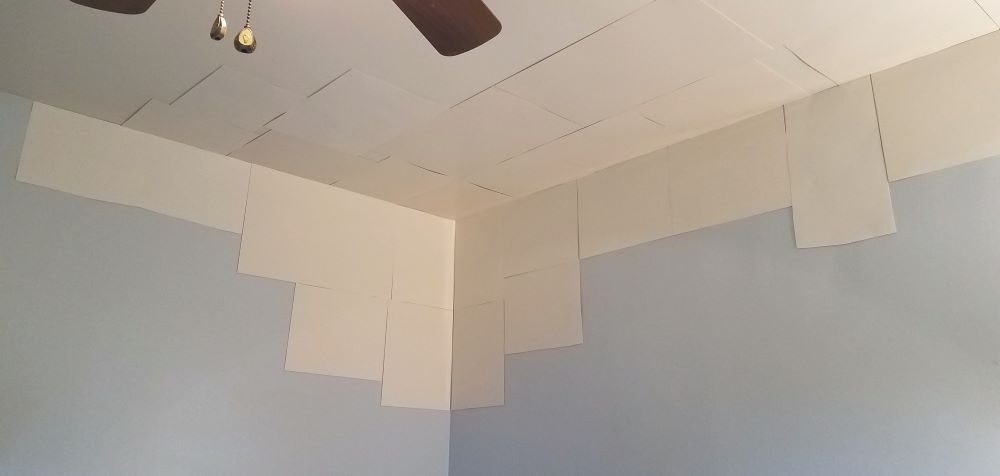
Step 1: Prepare the Base
Cut out your poster board (or foam board) to define the size and shape of your future cloud section. Attach it to your ceiling using removable adhesive putty for temporary placement or double-sided tape for a more permanent installation.
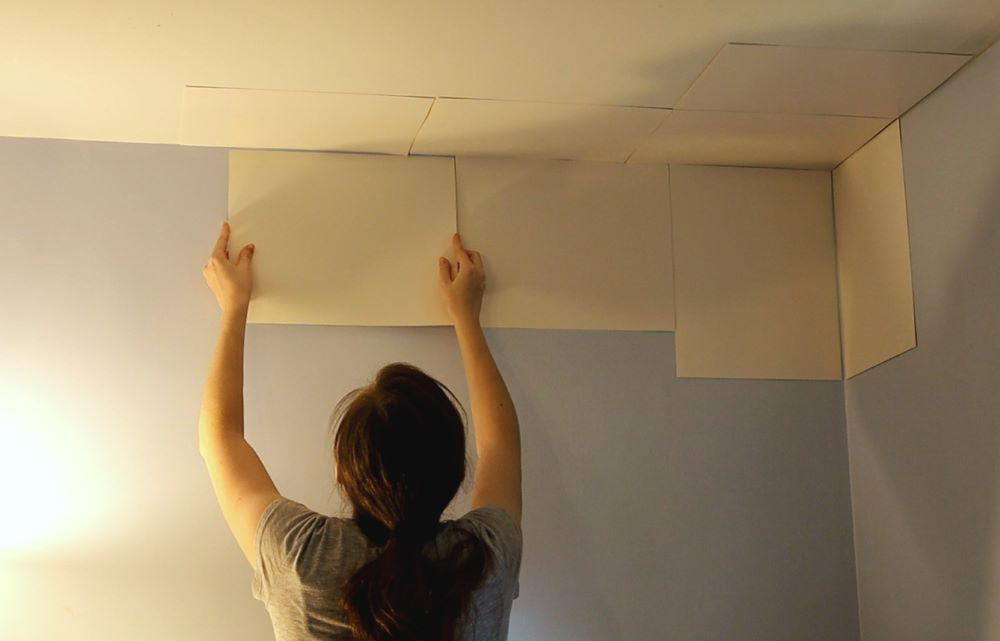
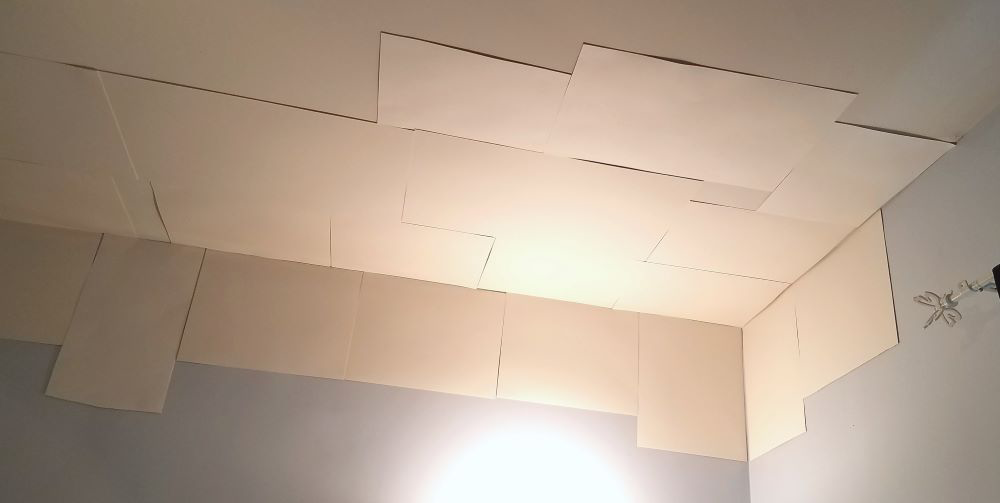
Step 2: Fix the Boards
Attach all your cut-out boards to completely cover the chosen area. Make sure they are secure and well aligned to serve as the perfect canvas for your cloud.
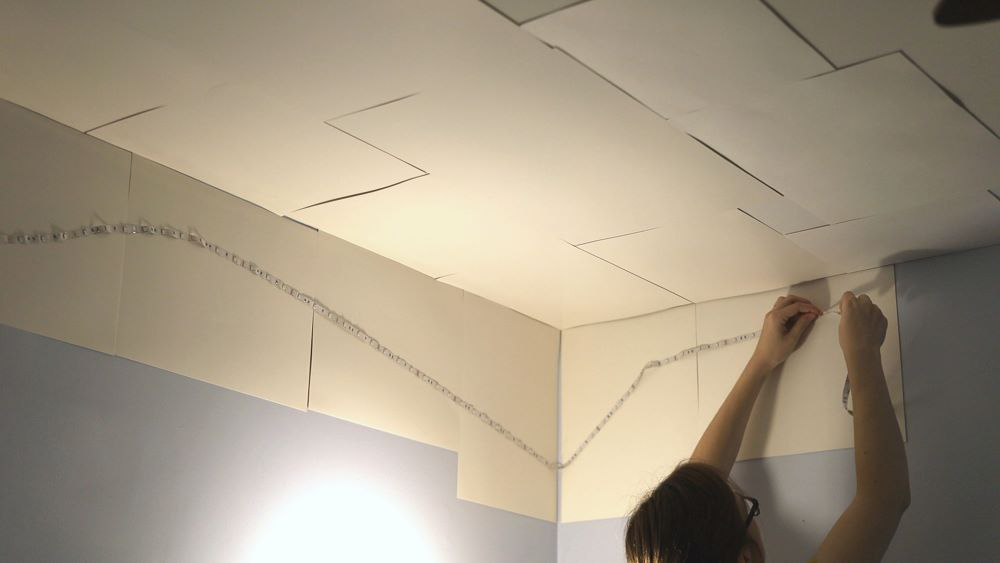
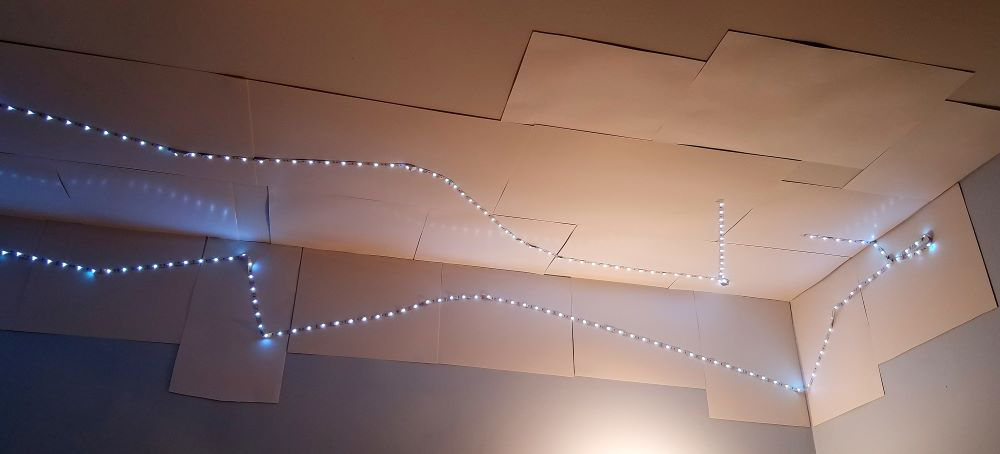
Step 3: Attach the LED Strips
Place your LED strips along the edges or create patterns on the board. Ensure they are firmly attached. Test your LED system before proceeding to make sure it works perfectly!
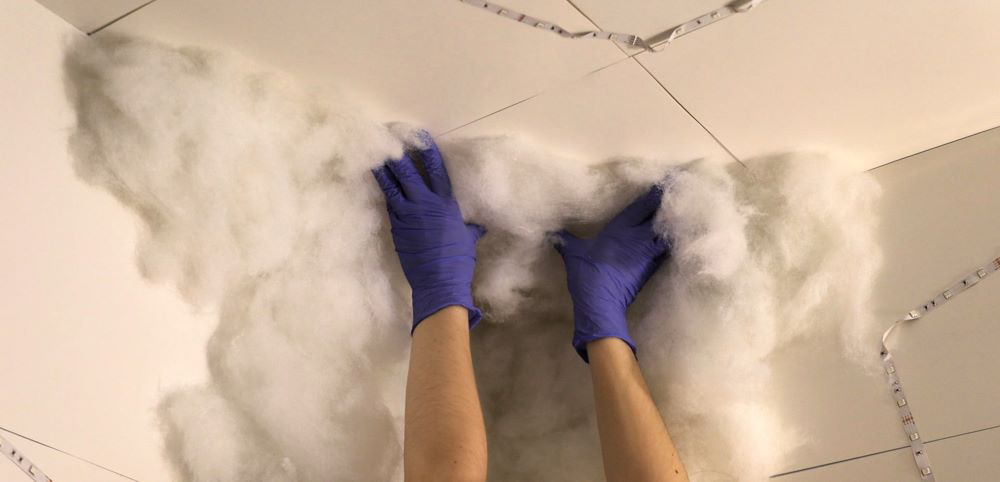
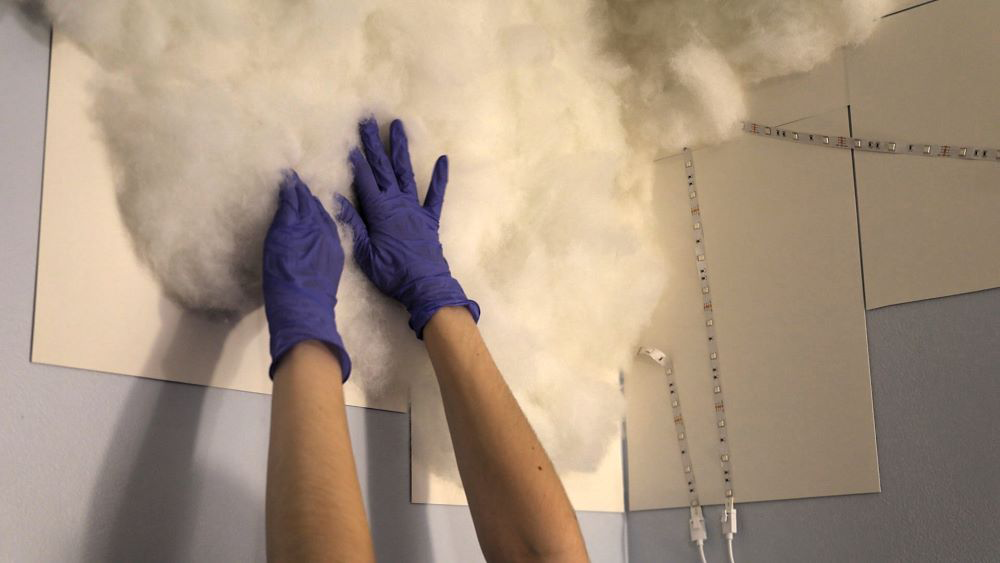
Step 4: Apply Polyfil Cloud With Spray Adhesive
Spray adhesive in sections to the board and gently press the polyfil (or fiber fill) to create fluffy, realistic clouds. Work in small patches for best results and adjust the "clouds" until you get the effect you want.
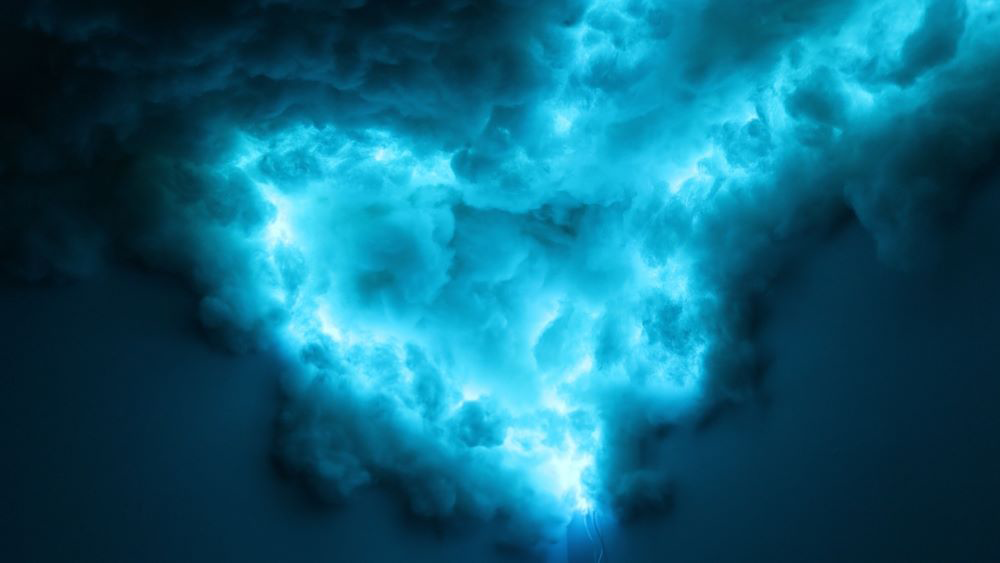
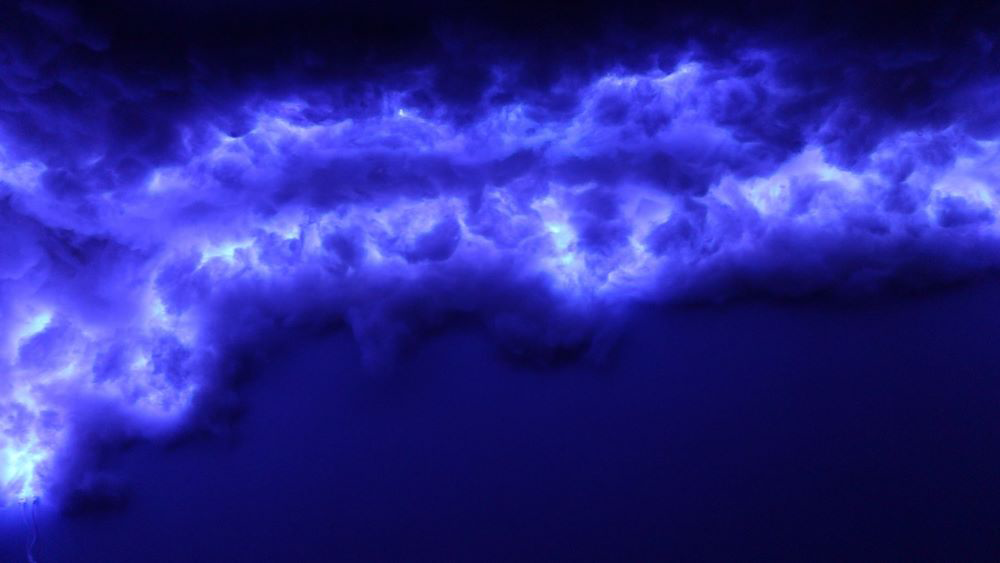
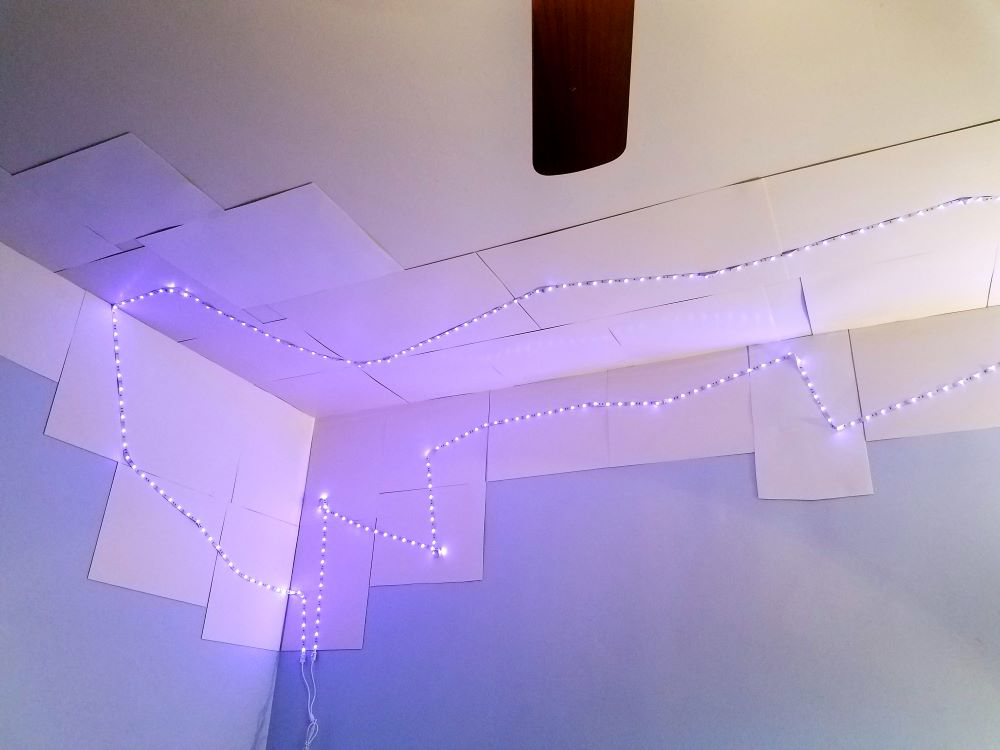
Step 5: Final Result
Turn on your LED lights to enjoy your magical cloud ceiling! Adjust brightness and colors to suit your mood or activity.